


Search
Who is online?
In total there are 2 users online :: 0 Registered, 0 Hidden and 2 Guests None
Most users ever online was 123 on Sun Apr 11, 2021 2:28 am
Latest topics
How to properly paint your valve cover.
DSM Tech :: Advanced Tech :: Tech Articles :: Engine&Fuel
Page 1 of 1

How to properly paint your valve cover.
![]() by Onefast2gdsm Tue Aug 21, 2012 1:33 am
by Onefast2gdsm Tue Aug 21, 2012 1:33 am
Lets face it - one perfect wy to make your car your own is to customize the engine bay. One thing many DSM'rs do is paint the vlave cover. There are many ways to do it, but the method I use works out great.
Materials:
Paint
Grinder (if smoothing things out)
Paint stripper if preferred
Sandpaper (80, 220, 500)
Soap
Water
Degreaser of some sort (I prefer Easy Off oven cleaner)
Small container
Q tips
Spare spray can cap
Step 1.
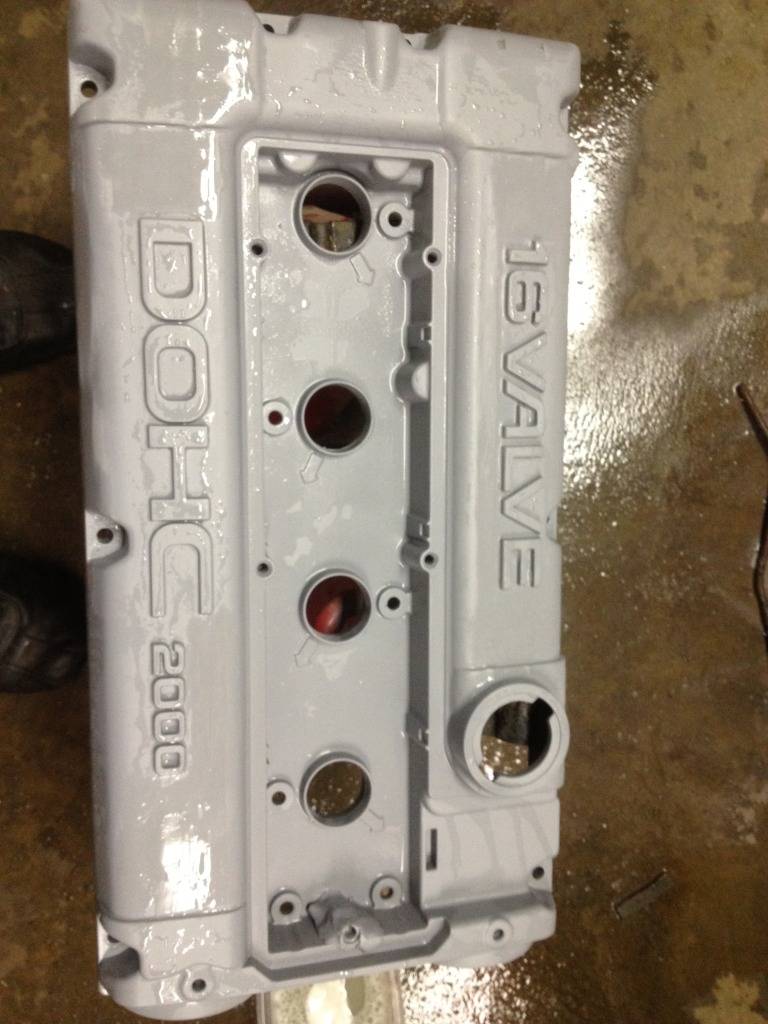
the first step is to strip the paint off the valve cover and or grind it down to get rid of unwanted letters etc. I took the embossed lines off of mine. I used a die grinder and did a little at a time to make sure I wasnt going through the cover. I then used 80 grit sandpaper to start smoothing it out. Once you get it smooth, take your 220 grit and go over it once more.

Step 2.
Cleaning the valve cover. I took a garbage can lid and flipped it upside down and sat the valve cover in it and sprayed it with easy off. I let it sit for 10 minutes and got the under side of it sprayed as well. Let it sit for another 10 minutes and take a hose and spray it down. Make sure to get all of the degreaser off. Repeat until there is no dirt or grease.
Step 3.
Priming the valve cover. I used etch primer to start priming. I sprayed about 3 or 4 coats and let it sit for an hour.
Step 4.
Wetsanding. Once the paint is dry enough, get a small container and put soap and water in it. Take your 500 grit sandpaper and soak it in the container. Find spots that need sanded down and start sanding. Make sure you keep the sandpaper wet at all times. Repeat until the surfaces are smooth and clean off with water and let dry.


Step 5.
More priming. I sprayed another 3 coats of primer, two light coats and one heavy. Instead of using etch primer this time, I used regular engine enamel primer. Let dry.

Step 5.
Start painting. Spray a light coat and let it dry for a few minutes. Dont go crazy, just get the color started. After the first coat is dry, apply as many coats as you want. I did about 4. Let dry.


Step 6.
Painting the letters. I used a q tip to do the letters. i find it is much easier than taping the letters off and it gives the letters a different texture so it stands out. Take a spare spray can cap and spray whatever color you want the letters to be inside the cap. Grab your q tip and dip it in the cap. CAREFULLY start lightly dabbing the letters. Be sure not to get it on the other paint. As your just about done finishing the first coat of the letters, the paint should start getting tacky in the cap. This makes it much easier to finish them off. Dab the letters until they're fully painted. Let dry.

Step 7.
Wetsand if necessary.
Step 8.
Clear coat. Apply 2 to 3 coats of clear and let dry. You're done!

Materials:
Paint
Grinder (if smoothing things out)
Paint stripper if preferred
Sandpaper (80, 220, 500)
Soap
Water
Degreaser of some sort (I prefer Easy Off oven cleaner)
Small container
Q tips
Spare spray can cap
Step 1.
the first step is to strip the paint off the valve cover and or grind it down to get rid of unwanted letters etc. I took the embossed lines off of mine. I used a die grinder and did a little at a time to make sure I wasnt going through the cover. I then used 80 grit sandpaper to start smoothing it out. Once you get it smooth, take your 220 grit and go over it once more.
Step 2.
Cleaning the valve cover. I took a garbage can lid and flipped it upside down and sat the valve cover in it and sprayed it with easy off. I let it sit for 10 minutes and got the under side of it sprayed as well. Let it sit for another 10 minutes and take a hose and spray it down. Make sure to get all of the degreaser off. Repeat until there is no dirt or grease.
Step 3.
Priming the valve cover. I used etch primer to start priming. I sprayed about 3 or 4 coats and let it sit for an hour.
Step 4.
Wetsanding. Once the paint is dry enough, get a small container and put soap and water in it. Take your 500 grit sandpaper and soak it in the container. Find spots that need sanded down and start sanding. Make sure you keep the sandpaper wet at all times. Repeat until the surfaces are smooth and clean off with water and let dry.
Step 5.
More priming. I sprayed another 3 coats of primer, two light coats and one heavy. Instead of using etch primer this time, I used regular engine enamel primer. Let dry.
Step 5.
Start painting. Spray a light coat and let it dry for a few minutes. Dont go crazy, just get the color started. After the first coat is dry, apply as many coats as you want. I did about 4. Let dry.
Step 6.
Painting the letters. I used a q tip to do the letters. i find it is much easier than taping the letters off and it gives the letters a different texture so it stands out. Take a spare spray can cap and spray whatever color you want the letters to be inside the cap. Grab your q tip and dip it in the cap. CAREFULLY start lightly dabbing the letters. Be sure not to get it on the other paint. As your just about done finishing the first coat of the letters, the paint should start getting tacky in the cap. This makes it much easier to finish them off. Dab the letters until they're fully painted. Let dry.
Step 7.
Wetsand if necessary.
Step 8.
Clear coat. Apply 2 to 3 coats of clear and let dry. You're done!

Onefast2gdsm- Admin
-
 Posts : 112
Reputation : 1
Join date : 2012-08-06
Age : 33
Location : Newport, PA -


DSM Tech :: Advanced Tech :: Tech Articles :: Engine&Fuel
Page 1 of 1
Permissions in this forum:
You cannot reply to topics in this forum
» EC Council Computer Hacking Forensic Investigator CHFI V4
» EC Council Computer Hacking Forensic Investigator CHFI V4
» EC Council Computer Hacking Forensic Investigator CHFI V4
» [COMPLETE]RF.Seal.2.2.3.2.zip
» [COMPLETE]RF.Seal.2.2.3.2.zip
» www.overnightdecalsfromjapan.com is live!
» 96 Gst-X build
» ODFJ - Help us hit 3k!